Monday, October 22, 2012

Catching up!

I know I've been quiet lately on the blog front, and I never finished my London series of posts. Whenever I read bloggers apologizing for their absence I roll my eyes, yet I always seem to be one of them. Life has been happening lately though, so what can you do.

The biggest piece of life that has been happening lately is that I'm pregnant! I'm actually seven months pregnant now, eek! We are having a little girl and just about every waking moment has been spent prepping and crafting for her arrival on or around January 3, 2013.


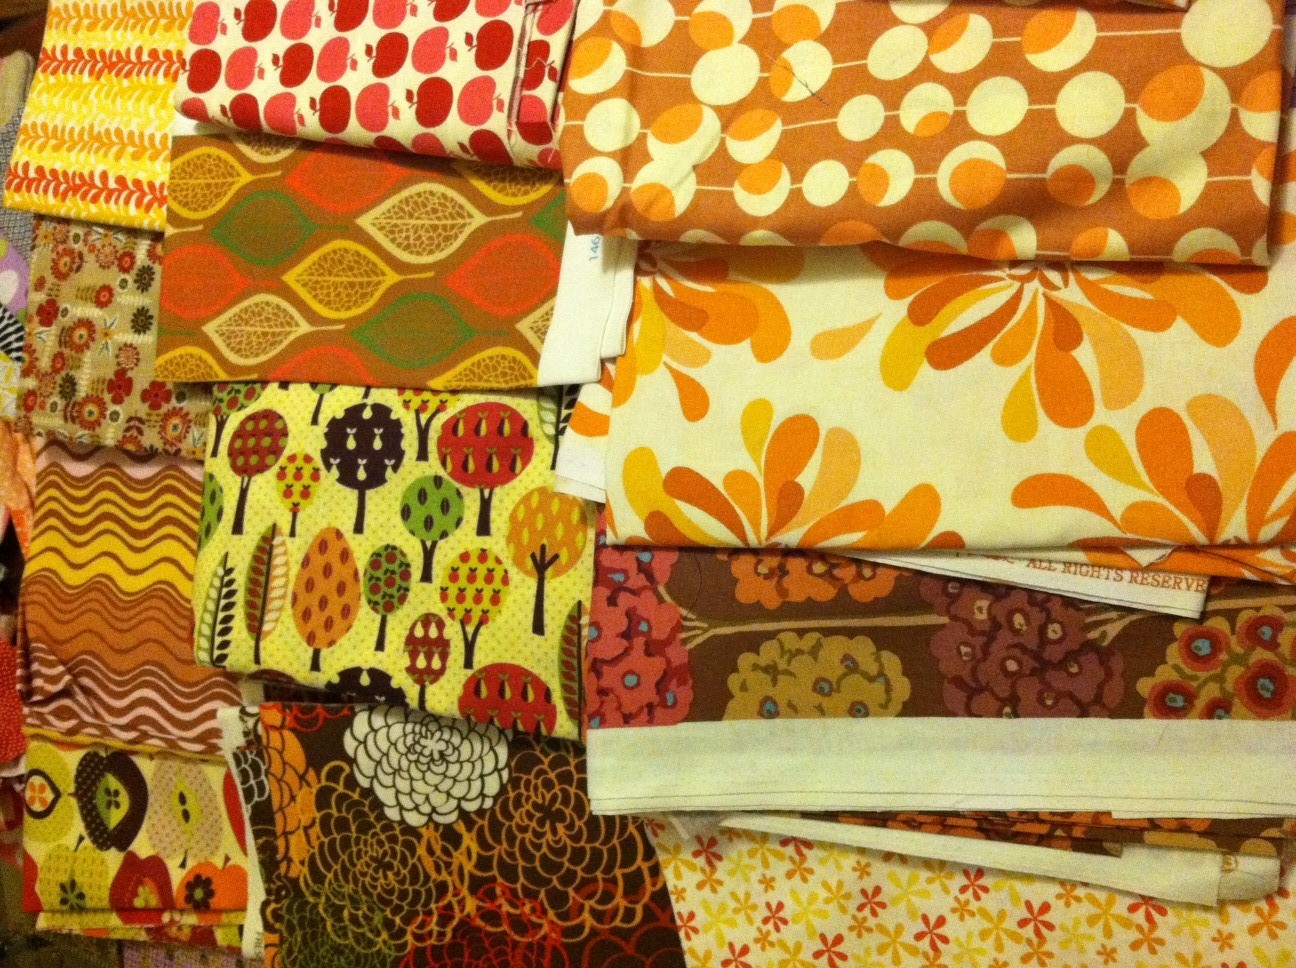
It's getting harder to lean over my sewing table to measure and cut so I'm trying to get as much done now as I can!

I have tons and tons of finished projects to take photos of and post about. I use Ravelry for all of my knitting projects, I really wish we had something like that for sewing. Instead I'll try to discuss my comments on the patterns and fabric in the blog post. I've been doing a lot of iPhone photos lately (so convenient!) but I'd like to get some higher quality ones with the real camera on a nice day.

My latest project started off as Halloween related, but I dragged my feet on it and finally just whipped these babies up yesterday. They can totally be used until Thanksgiving though since I made the sashing brown! I used the Pumpkin Block Tutorial at Sew Lux, and just used the coaster directions since I only made two blocks. I really only need one (the dots of course!), so I'm going to gift the other one. I actually like the plain one better, but the binding looks nicer so I'll give it away.


Orange is probably the smallest color in my stash, so these were actually the only two suitable fabrics which is why I only made two blocks. That also may have something to do with the fact that I pulled out all of my fallish fabrics at least a year ago for a quilt and the pile is still sitting on my second sewing table! I forgot all about them. None of these really would have worked anyways right?


Overall the block was really easy, and I'm pretty sure I spent less than two hours on the whole project. I wanted a little mug rug for myself to keep on my desk at work. Originally I was going to do the three blocks but it seemed too big, then I was going to do just one block and free motion the word BOO! next to it or maybe piece some little candy corns. Then it took me so long to think about how I wanted to do the project that I never actually started, so I said to heck with it and I just made the simple block with brown sashing so that it could be used all fall. Why do I overthink projects?

Also, I used Fusi-Boo batting (two layers) and ended up doing binding to put a little more orange into it. Maybe if I had used the plain binding on the dot pumpkin, I'd like that one better. I must have been confused because I thought my block was 5" square (it was 5.5") so I only cut 22" of binding, thinking I had extra! It was really close at the end there. Next time, 24" at least.

I do really want to finish posting about my London trip! To make it a little less daunting, I'll sum up London in just one post with lots of pictures and a list of where we went and what we did, instead of descriptions of every.last.detail. I still have yet to really go through the pictures and print them out or put them on Facebook even, so that has been the biggest hurdle! I'd like to do it soon before I forget what all we did though. We found some really great local restaurants and stores so maybe it will help someone planning a future trip. Or we can reference it when we go back (and we are SO going back!)

Friday, April 6, 2012

LONDON BABY! - Day 1

What an AWESOME place! We really had such a blast. It had been awhile since we'd done a true city vacation so it was a nice change of pace from our go-to choice of cruise/beach. We really love exploring cities on foot, looking at the architecture, people watching, and finding those hole in the wall local dives where we end up eating the best meal of the trip. So what did we do and see? Well the trip lasted about 11 days and we took literally 1000 photos, so I'll deliver it in stages.

Day 1: Arrive, nap, shop, eat


Our awesome apartment overlooking Hyde Park! We're the window on the 4th floor above the bay window. Sorry I should have put an arrow. We loved this place, and I would definitely recommend renting a flat vs. staying in a hotel for young couples on a city vacation. It was the perfect hub for us, near to transport, not too touristy since it's a residential neighborhood, which also means there were lots of conveniences nearby including a supermarket. We don't mind cooking a few meals here and there to save money and time on vacation, and we don't full breakfasts every day anyways (but I'm now addicted to croissants!) Oh and by cooking, I mean heating up our leftovers and microwave dinners or ramen. It's still a vacation after all.


Since our flight landed early in the AM on Saturday as soon as we got to the apartment we napped. Even I, who can never nap, fell asleep in the middle of the day. It helped that it felt like 3 AM, I was running on maybe 4 hours of sleep and there were blackout shades on the windows. However, even with this refreshing nap my brain was apparently still fried and I plugged my blow dryer into the adapter. To do this I even had to peel off a sticker with a big picture of a blow dryer with an X through it! Duhhhhhh. 
Ready to set off on our first adventure!
So began our first excursion of the day, shopping for either a replacement fuse or a new adapter (it was the latter). Luckily we were staying on Oxford St, the biggest shopping street in London - can you tell I planned our location well?!? Took me weeks to find the perfect spot and I will definitely say this. was. it. So we looked at a map, I knew Tottenham Court Rd had lots of electronics stores, we were bound to find something there and we could definitely pound out the 1.5 mile walk in no time and find some dinner along the way. 

Well, we took the long route to the electronics store - through the Disney store, Urban Outfitters, an odd sort of store called Desigual I think, a store that sold only tights, any place that looked interesting really. It was the best! When we reached our destination we were told nope, no fuses, you gotta just suck it up and buy a new adapter. Dejected at the thought of shelling out the cash for an adapter twice, we decided to drown our sorrows in a delicious meal. Right across the street was a neat looking place called Garfunkel's. Turns out it's like the TGI Friday's of the UK, they're everywhere!!! The food was good though and I started off with a cold glass of Stella - I was pretty worried I would only be served warm beer.


Finally, on the way back we stumbled on a Japanese traveler supply store. They had everything you could ever need to organize your belongings in a simple and aesthetically pleasing way while on the go, plus some creature comforts as well. I wish I had gotten a picture but we were kind of burnt out at this point so we made our trip quick. I really could have lingered over all the different cosmetic bags, drawstring pouches, empty jars for toiletries, comfy looking slippers, even a mini folding hair dryer! But once we found the adapter and decided it was the best price we'd seen yet, we were back on our route home. I did get a picture in the Disney store - my thoughts exactly!


Saturday, March 31, 2012

Thank you, Google!

I'd like to give a shout out to Google. Today I was thinking that Google has been doing pretty well for me lately so I decided it deserved a thank you. And how often does it ever really get thanked? Whenever a question pops into my head or I can't remember the name of that band that sang that song, or Tom and I are arguing over what year that movie came out, Google is where I go for the answer and where I'm sure you go too. But then I just close the browser and move on. Sorry, Google. I'll strive to thank you more often.

The reason I thought to thank Google today was that it provided me the link that led to the creation of this patchwork block. After a few weeks away from my sewing machine (because I was in LONDON BABY! more about that later), I was itching to make something quick yet satisfying. Now I have this super cute and simple block, although its fate is yet to be decided. Mini quilt? Part of a larger quilt? Pillow cover? Hmm can't decide.


So why would I thank Google for a quilt block? I have chevrons on the brain and wanted some inspiration, so I typed in "chevron quilt tutorial" and started clicking links. One of the first pages I came to was the blog of You had me at bonjour. I liked the quilt but it wasn't what I was looking for. The blog looked fantastic so I left it open to browse later - I was on a mission. About an hour later I was checking email and what do you know, the Chalk Talk newsletter was featuring the chevron quilt tutorial I had just been looking at! So I thought I'd better page through right away. The most recent post was about where she got the inspiration for the quilt, a manhole cover! She also posted some other inspiring photos, including the one of a window grate that led me to create the block above. So really I should say thank you Google, for showing me this amazing blog, and thank you Kirsty for the inspiration! I will definitely be using this log cabin style block again but with other color/print combinations. I think this would look great with all print fabrics that alternate like I have here, or fade out towards the edge. 

Probably one of the even greater things that Google has done was lead me to the blog that inspired my newest goal, training for the Cleveland Half Marathon on May 20th! Before vacation I was quickly losing momentum on the design for my camera bag. There were just too many options and I wanted the perfect bag (read: impossible). So I googled "DIY camera bag" or something to that effect. I found the blog of Live.Laugh.Eat., a girl who is about my age who loves Marshall's, is also an asthmatic with a peanut allergy, and is a runner who is trying to eat healthy and stay in shape. I quickly got hooked and tried some of her recipes right away. Deeeeeeeeelicious! 

My Pumpkin Oatmeal Raisin Cookies a la LLE. Recipe here.
The idea to run the half marathon had been floating in my head for awhile, but after reading about some of her long runs and tips I decided, why not? At the very least I'll start training and become a better runner, whether I'm ready in time or not. So except for a few lapses during vaca because of blisters, and also today because of laziness (yes I feel guilty, but I promise to run a great 6 mi tomorrow!) I'm doing fairly well. An even bigger part of this is the change to my diet. Sure, I still love Doritos and french fries. And pizza, cheese dips, and candy, cakes and cookies. But I'm finally learning where to find sources of protein that I like and am not allergic to, and I've started sneaking fruits and veggies into my meals. Thank you Google for pointing me to Allie's awesome blog!

Oh yeah, London! I just finished weeding through the 1000 photos we took (that's literal) and can't wait to post a few, plus photos of my souvenirs! Most of which are in my sewing room, actually. Since I also made two bags for the trip, I'll include those too. I loved the trip so much I can't wait to share!

Wednesday, March 7, 2012

current important dilemmas

I agonize about the smallest of decisions. Today's dilemma involves what color Bandana Cowl I should make to match my new kelly green trench coat below.


Photo courtesy oldnavy.com.
This has been my number one topic of thought since I purchased the coat on Monday, even taking the place of how to design my very first camera bag which has been keeping me up at night for over a week now. (Yes, I'm lame, I know this.) Initial inclinations were towards a spring-y yellow, but I thought it might all be too Eastery. Kelly green always goes great with the right shade of blue, or maybe stick with a neutral like cream or grey? But I already have a grey cowl...am I overthinking this? I even Googled "colors to pair with kelly green". Someone please offer a suggestion before I spend more time thinking about the cowl than I would actually spend knitting it up!
One area where inspiration did hit the mark was when I was browsing some madeline tosh chunky yarn for my cowl I was reminded of the beautiful Creature Comforts Cardi, pattern also by madeline tosh.

Photo courtesy Ravelry.
This is at the top of my dream knits list. It takes five skeins of madeline tosh vintage for the XS size! Thank goodness that's all I would need because while this is definitely my new favorite yarn to work with, I'm not ready to drop a Benjamin on yarn for a cardigan I may or may not have the skills to make. But wouldn't it look great in Magnolia Leaf?

Get this yarn at knit-purl.com.
I have the notion in my head that all projects must. be. perfect. While sometimes it provides motivation to do it right, this can lead to an inability to finish something that's not going well, or even start it! I'm constantly searching for the ideal purse, which doesn't exist. This is why my designs constantly get revised, and why I discard even my own purses after a short time. Also this is why I can't seem to settle on a design for my London camera bag. D$ is awesome at getting things done, I think I'll have to get her to keep on me until I actually have a finished bag in my hands. After all, if there's something I'm not happy with I can always make another one. I'll leave you with a quote I keep on my desktop encourage me to get things done. Now to just follow my own advice...

Too much planning can lead to crippling inaction.

Tuesday, March 6, 2012

Oh happy day!

Behold its beauty!


We decided to take the plunge and purchase a DSLR before the London trip. I also wanted a new camera to take pictures for my Etsy shop. After tons and tons of research, I decided on the Nikon D3000. But I waited too long for a good deal and then I couldn't find one anywhere! So for virtually the same price, I was able to get a refurbished Nikon D3100! 

It arrived Monday but we didn't get to open the package until late evening, then it took awhile to charge, so we only got a few photos in. Plus, having nothing interesting to take photos of and it being night time, we got bored after a few minutes. Here are a few of the first of many wondrous photos to come...

Either... "You humans bore me." or "Stay away 
from my bag if you know what's good for you."

My nearly finished legwarmers! 
Lesson learned: This is not a flattering angle for my calves.

Kitteh has claimed this Target bag for her own. We aren't allowed near it. My new honey cowl was trapped under it for awhile but I rescued it yesterday and was able to bind off today. Photos of that to come soon, if I ever get home from work/errands/exercise before dark!

And the legwarmers are going to be the finishing touch on my outfit for celebrating St. Patrick's Day in London! I'm using Jane Richmond's free pattern on Ravelry (she is my new favorite knitting blogger btw). I should have some extra yarn leftover for the Straight on driving accessories handwarmers from Pickles. Of course it will probably be 60 degrees on our trip, but how can you go to the UK without wonderful wooly knits?

Spoilers - I baked some amazing pumpkin oatmeal raisin cookies and can't wait to share the details! More to come later this week, but the cookies definitely won't last that long, yum! 

Sunday, February 19, 2012

Hand Warmer Tutorial

Awhile back my grandma asked me to make her some rice handwarmers. She had a few stipulations and suggestions of course (this is the grandma who taught me how to sew, she's quite particular about this kind of thing!). She wanted them for driving, so because of that she wanted to wear them on the back of her hand so she could still grip the wheel. Also, they were to have channels so all the rice doesn't gather in one corner. She also wanted them for Christmas, and so I had only a week to come up with something!

Why reinvent the wheel, so I scoured the internet looking for the ideal tutorial. There are plenty out there, but most are no more than a beanbag you hold in your hand. I knew this would never do, so this kept me awake for several nights until the perfect idea popped into my head - a handwarmer with its very own pouch strapped to your hand to hold it in place! It can still fit under a glove or mitten or be worn alone, which is what I plan to do with my own set when my hands get cold from typing all day at work. I decided to make a tutorial during construction of the second set for all you folks out there with hands as cold as mine!


I've put together a sort of photo collage, but there's also written instructions below. The photos seem to have lost some sharpness when I collaged them so if something's not clear let me know!

Materials list

In addition to the usual suspects - sewing machine, scissors or rotary cutter, ruler, iron - you will need:

Rice for filler, I didn't measure but probably half a cup
Two pieces of flannel measuring 9.5" x 4.5"
Four pieces muslin or cotton measuring 4" square
Two pieces 0.25" wide elastic cut to 4" length
Velcro, I used two sets of the little sew-on circle pairs

Instructions

1. Begin assembling the rice bags! Remember you are making two. Begin by pairing two pieces of muslin (if your fabric has a print these will be wrong sides together) and sewing a 1/4 inch seam around three sides. Trim your seam and clip the corners, being careful not to cut the stitches. Turn and press flat.

2. Sew another 1/4 inch seam around the same three sides. You want to catch the previous seam in this seam allowance so there's no stray threads on the outside. Turn and press again, now it looks normal on the outside - photo 2 - but you have no raw edges inside the bag. (Why do we do it this way? No shoddy seams here! I think a mini rice explosion while on your way to work in the morning would be wrong way to start the day.)

3. Sew the channels for the rice now. I just divided the bag into rough thirds and stitched a straight line, stopping 1/2 inch from the open edge. No need to be exact with the width of the channels. I didn't take a photo of this, but now would be a good time to fold down both sides of the open end 1/4 of an inch and press. You'll be sewing the bag closed here later and it's easier to fold the seam down when the bag is empty.

4. Fill with rice! I used a small kitchen funnel, or you can make a paper cone. Fill so the channel is full but not so much that the bag is stiff. Then using either your machine or a whipstitch, close the bag at the seam you pressed in step three. Your rice bags are complete! If you need to change the rice out in the future, this seam is where you can remove the stitching for refilling.

5. Now we move on to the flannel pouch. Turn a 1/4 inch hem on the long sides and press. On the short sides, turn a 1/4 inch and press then repeat. Topstitch the short sides only.

6. Time for Velcro attachment. On the wrong side of the flannel, place the soft piece of Velcro at one end in the center, as close as you can get to the seam without overlapping and stitch it down. This is best seen in photo 7 actually. You will have stitches showing on the right side of the flannel, so make sure your bobbin thread matches and try to make the stitches look nice. You could also glue a button down later to pretty it up a bit! For the second piece of Velcro, the rough one, you'll have to figure out the placement based on where you put the first piece. Make a mark six inches from the edge without the Velcro. Fold up the flannel into a pouch with the edge at the mark. Fold the flap over, see if it fits. Adjust it until it looks perfect. Now make a mark on the right side of the flannel where the other piece of Velcro should go and stitch it down.

7. Now we close up the pouch and attach the elastic. Fold up the bottom of the pouch to the mark again and pin it in place. Insert the edge of the elastic into one side of the pouch and pin or hold it in place. It should be about in the middle. Starting at the top of the flap, stitch all the way down to seal up one side of the pouch, making sure to catch the elastic in the seam. Flip the pouch over and sew the elastic down again as in photo 8 to secure it to the back of the pouch.

8. Sewing up the other side will be a bit trickier. You should be looking at the back side of the pouch. Tuck in the other end of the elastic, I recommend pinning it into place. The pouch will bunch up. From the back side, stitch down the side of the pouch starting at the bottom this time. I backstitched over the elastic to secure it.

Now heat up the rice bags, pop them into their pouches and wear your new warmers!  Since personal preferences and microwaves vary, I recommend starting with 30 seconds (ouch! more like 15 or 20 seconds) and working your way up. The rice bag fits with the channels horizontally, by the way. Enjoy! I'd love to hear if anyone makes their own!

**Here is a tip now that I've tested out my own set. Maybe add a drop of essential oil or a bit of potpourri. When you heat it up it smells like dinner is ready! Lavender is a nice relaxing scent to try.

Tuesday, February 14, 2012

Happy Valentine's Day!

Here is a little pillow I whipped up for V-Day based on Diary of a Quilter's tutorial. This is a quick and improvisational project. I really just kind of winged it (wung it?) by cutting out the hearts first and then sizing the pillow to what would fit them all.


Turns out it fits perfectly on the Poang! That chair needed lumbar support anyways.


There weren't a lot of instructions but I did make a change. Since I can't stand to hand sew or embroider (it was bad enough closing the pillow) I just machine stitched two rows with red thread for the "string" before attaching the hearts, then again over the top for about an inch. You can kind of see it through the lighter hearts, but if it were a real string you'd see it anyways, right? I was just being accurate...

I decided to creatively stuff this pillow due to limited fiberfill resources. But never fear, when it comes to craft supplies I'm borderline hoarder so I have several plastic bags full of fabric scraps. Not usable scraps that could be used to make a super fun quilt, just bags and bags of selveges, seam trimmings, bits of fusible fleece and pieces that are too small to make it into the actual scrap bins. The sides and front are fiberfill to give it some cushion and keep the dark strips from peeking through. It's pretty comfy actually! Very easy on my back, and it has a nice weight so it doesn't get crushed after some use. What are some of your Valentine's crafts?